
Sharpening and maintenance have the greatest impact on the longevity and daily performance of your blades. A dull knife is more harmful than a sharp one when it comes to knife safety.
This is due to the fact that kitchen personnel must rush through the process of cutting meat and slicing vegetables. Sharpening stones make it simple to keep blades sharp on a daily basis. Our comprehensive instruction will explain to you how to utilize a sharpening stone.
How to sharpen a Blade with a Stone?

You can start sharpening your knife once you’ve found the right angle. You’ll use the same sharpening method whether you buy a sharpening stone made of Novaculite, aluminum oxide, or silicon carbide (also known as Arkansas, India, and Crystolon stones). If there are any peculiarities, double-check the manufacturer’s instructions. In addition, you can check the recommendations for the Bait Knife.
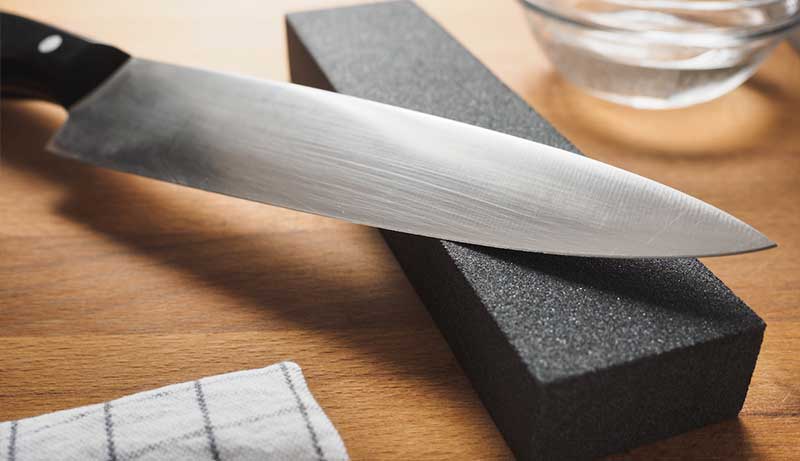
Step 1: Keep the knife pressed up against the stone. Hold the knife in one hand at a 20-degree angle with the blade. The blade’s edge should be pointed away from you.
Place your other hand’s fingertips on the flat part of the blade near the sharp end. As you sharpen the blade, you can control the pressure and direction with your fingertips on the blade.
Step 2: Swipe the blade across the stone on one side. Slide the blade down the stone slowly, sweeping it in an arc as you go. To sharpen the blade uniformly, draw the full edge of the blade across the stone from heel to tip.
Continue to sharpen the first side of the blade by running it against the stone. When the stone begins to feel dry, remember to damp or oil it down.
Step 3: Sharpen the other side of the knife by turning it over. Turn the knife over and run the blade across the sharpening stone from heel to tip until the blade feels sharp when you touch it with your fingertips. When touching any knife-edge against your skin, use extreme caution.
Step 4: Use a finer grit to sharpen the stone. If your knives were really dull and you sharpened them using a coarse grit, you might wish to polish them with a fine-grit stone.
From the heel to the tip of the blade, rub it on a fine grit stone. To sharpen the other side of the blade, flip the knife over.
Step 5: Check the knife’s sharpness. After you think you’ve sharpened your knife to perfection, wash and dry it. Hold a piece of paper up to the light and try to cut through it with the knife.
The knife should readily cut through the paper if it is sharp enough. You’ll need to sharpen it a little more if it’s not sharp enough.
What Are the Blade Sharpening Angles?

According to the experts, you have to sharpen your knives at a 22.5-degree angle. To find a 22.5-degree angle, follow these simple steps. We have included the procedure to help you through the guide.
- Hold the knife at a 90-degree angle with the blade down.
- Reduce the distance between the 90-degree angle and the table by half by turning the knife to a 45-degree angle.
- Move the knife to half of the remaining angle once again. You should now have a fair idea of the proper sharpening angle. As needed, you can adjust the angle up or down.
How to Clean a Sharpening Stone?

To clean your sharpening stone after each usage, just brush away any metal shavings and excess oil with a moist towel. After each usage, there is no need to rinse or wash your sharpening stone.
Place your sharpening stone back in its box or keep it somewhere dry after cleaning it down. Clean the stone according to the manufacturer’s recommendations as well.
If you have an oil stone, for example, you may need to scrub it with a stiff fiber brush and bathe it in oil on a regular basis. Remove any residue from a water stone and put it in a dry cloth until you need to use it again.
How to Tell If Your Blade Is Sharp Enough?

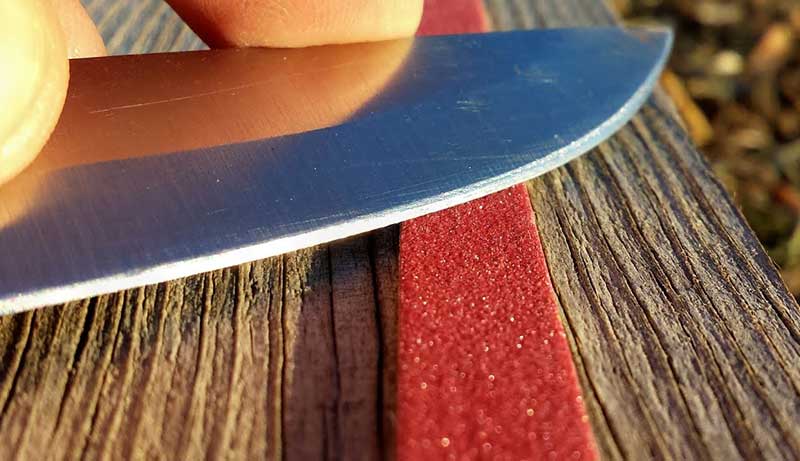
When the burr is gone, you know your blade is sharp enough. You’ll notice a burr form on the other side of the edge when sharpening knives, especially on rougher stones. It’s tough to see, but it’s simple to feel. By moving your finger from the knife’s spine to the edge, you can check for burrs.
As you sharpen each edge, the burr will leap from side to side, and once you’ve felt the burr migrate to both sides, you can move on to the next finer stone. The burr will get smaller and smaller until it disappears once you reach the finest grit. You’ll know your blade is sharp enough when the burr is gone.
What is Some Advanced knife Sharpening Tips?
- Because sharpening the knife wears down the stone, it’s important to rotate it frequently to guarantee even wear.
- You may need to resurface a worn stone with a leveling stone if it is especially worn. Be aware that these can be costly.
- As previously said, a sequence of stones of varying granularity would be great. Stones with a grit of less than 1000 are effective for healing significant blade damage (chips, pits). Depending on how well you take care of your knives, you may only require a quick sharpening with a 6000+ gritstone, or you may need to start from the beginning with 1000 grit.
- If you’re going to spend money on a fine stone set, you might as well get a leather strop as well. To align, smooth, and polish the knife, a leather strop would be used instead of honing steel. This is how you’ll acquire a highly gleaming, razor-sharp edge.
Final Words
A chef’s knife is undoubtedly the most important instrument in the kitchen. Cutting with a sharp knife requires less force and is more predictable. You’ve undoubtedly experienced a frightening experience where the knife slid on whatever you were cutting and you were nearly cut.
It’s risky to use a dull knife! A sharp knife won’t give you master chef-level cutting skills (that takes time and effort), but it will make your life easier and cooking more fun.